Wednesday, 26 June 2013

How to create SegmentedControlButton to change color of textfield-text in Xcode

 Here, we will teach you how to make a segmented control button with 3 segments, and how it can be used for changing color of text in an UITextfield.


in .h:

        @interface ViewController : UIViewController{
            IBOutlet UISegmentedControl *colorChooser;
            IBOutlet UITextView *sampleText;
        }
        @property(nonatomic, retain) UISegmentedControl *colorChooser;
        @property(nonatomic, retain) UITextView *sampleText;

        -(IBAction)colorChanged;
        @end

in .m:

        @implementation ViewController

        @synthesize colorChooser,sampleText;

        -(IBAction)colorChanged{
            if (colorChooser.selectedSegmentIndex==0)sampleText.textColor= [UIColor blackColor];
            if (colorChooser.selectedSegmentIndex==1)sampleText.textColor= [UIColor blueColor];
            if (colorChooser.selectedSegmentIndex==2)sampleText.textColor= [UIColor redColor];
   
        }
in xib:
 
  • Drag and drop a segmented control view, and make it a 3 segmented one.
  • Drag and drop a text view
  • From "Connections inspector-window", connect:
                          Segmented Control : Value Changed            ---->colorChanged
                          Segmented Control : New referencing outlet ---->colorChooser
                          TextView          : New referencing outlet       ---->sampleText 


Now Build and Run the application. You can see the text field and 3 segmented button. Click on each segment and see the change in color of the textfield text.


Tuesday, 18 June 2013

How to add popUp/popOut like effects to UIVIew in cocos2d

You may have noticed the popUp and popOut effects of UIAlertView. We can even add such effects to our custom UIViews also. In this tutorial, we will teach you how to add popUp/popOut like effects to UIVIew in your cocos2d application.


in .h:

         UIView *profileView;


in .m:


    //First Create the UIView, and assign its alpha value to zero in the init method
        profileView = [[UIView alloc] init];
        profileView.frame = CGRectMake(50, 50, 270, 430);
        profileView.backgroundColor = [UIColor blueColor];
        profileView.alpha = 0;
        [[[CCDirector sharedDirector] openGLView] addSubview:profileView];

    // Call this function for Fade-In/PopUp
    -(void)effectFunction_FadeIn{
        profileView.transform = CGAffineTransformMakeScale(1.3, 1.3);
        profileView.alpha = 0;
        [UIView animateWithDuration:.35 animations:^{
            profileView.alpha = 1;
            profileView.transform = CGAffineTransformMakeScale(1, 1);
        }];
    }

    // Call this function for Fade-Out/PopOut
    -(void)effectFunction_FadeOut{
        profileView.transform = CGAffineTransformMakeScale(1.3, 1.3);
        profileView.alpha = 1;
        [UIView animateWithDuration:.35 animations:^{
            profileView.alpha = 0;
            profileView.transform = CGAffineTransformMakeScale(1, 1);
        }];
    }

Monday, 17 June 2013

How to create UISwitch programatically in cocos2d

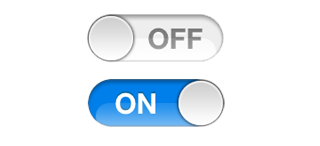
UISwitch is mainly used for representing two states. Normal UISwitch has 2 states: ON and OFF respectively.


Creating UISwitch in your cocos2d application is very simple. The steps for creating an UISwitch is described below:
       
First create an UIView:

        UIView *profileView = [[UIView alloc] init];
        profileView.frame = CGRectMake(0, 50, 320, 395);
        profileView.backgroundColor = [UIColor clearColor];
        [[[CCDirector sharedDirector] openGLView] addSubview:profileView];
   
Then you can create the switch and add to the UIView:

        UISwitch *mySwitch = [[UISwitch alloc] initWithFrame:CGRectMake(130, 235, 0, 0)];
        [mySwitch addTarget:self action:@selector(changeSwitch:)
                               forControlEvents:UIControlEventValueChanged];
        [profileView addSubview:mySwitch];

When the state of the switch is changed, it will trigger the following function:       

        -(void)changeSwitch:(UISwitch *)mySwitch{
                   // By NSLog, you can get the current state of the switch
                   NSLog(@"%@", mySwitch.on ? @"On" : @"Off");
        }

Sunday, 16 June 2013

How to make a simple segmented control button programmatically in your cocos2d application

You may have noticed the segmented control button in iPhone and iPad applications. In this tutorial, we will teach you how to make a simple segmented control button programmatically in your cocos2d application.


For creating  the segmented control view, first create an UIView:
 
        UIView *profileView = [[UIView alloc] init];
        profileView.frame = CGRectMake(0, 50, 320, 395);
        profileView.backgroundColor = [UIColor clearColor];
        [[[CCDirector sharedDirector] openGLView] addSubview:profileView];
      
Then create the segmented control label array:
 
        NSArray *itemArray = [NSArray arrayWithObjects: @"First", @"Second", nil];
  
After that, create the UISegmentedControl and add to the UIView:

        UISegmentedControl *segmentedControl = [[UISegmentedControl alloc] initWithItems:itemArray];
        segmentedControl.frame = CGRectMake(0, 0, 150, 40);
        segmentedControl.center = CGPointMake(160, 240);
        segmentedControl.segmentedControlStyle = UISegmentedControlStylePlain;
        segmentedControl.selectedSegmentIndex = 1;
        segmentedControl.tintColor = [UIColor colorWithRed:0.1f green:0.4f  blue:0.65f  alpha:1.0f];
        segmentedControl.segmentedControlStyle = UISegmentedControlStyleBar;
      
        [segmentedControl addTarget:self
                             action:@selector(segmentChanged:)
                   forControlEvents:UIControlEventValueChanged];
        [profileView addSubview:segmentedControl];

Monday, 10 June 2013

How to draw simple lines in cocos2d

Here, I will show you 2 simple methods to draw lines in cocos2d applications.


Method 1 - Draw line - default method, updates in each frame:

Syntax:
 
    - (void)draw{
           [super draw];
           glColor4ub(0,0,0,255);
           glLineWidth(2);
           glColor4f(1.0, 1.0, 0.5, 1);
           ccDrawLine(ccp(0,100), ccp(320,150));    // Draw line connecting (0,100) & (320,150)
    }
       

Method 2 - Draw line using CCRibbon:
        This  is a very simple method to draw lines in cocos2d. The advantage of this method is that, you can even draw lines with your textured image.


Syntax:
 
        ccColor4B myColor = ccc4(255, 255, 255, 150);
        CCRibbon *ribbon = [CCRibbon ribbonWithWidth:0.5
                                                                              image:@"green.png"
                                                                              length:1.0
                                                                              color:myColor
                                                                              fade:0.7f];

        [self addChild:ribbon z:8];
       
        [ribbon addPointAt:ccp(0,240) width:2];          // This will initialize the starting point at (0,240)
        [ribbon addPointAt:ccp(320,200) width:2];      // This will connect the previous point[(0,240)]
                                                                                   with (320,200) via a straight line


Sunday, 9 June 2013

How to create checkbox in HTML

 Checkboxes are useful for selecting multiple values, such as: the vehicles you own, foods you like, places you like/want to visit, etc.

Syntax:

               <input type="checkbox" name="food" value="Chinese">Chinese<br>
               <input type="checkbox" name="food" value="Western">Western<br>
               <input type="checkbox" name="food" value="Indian">Indian<br>
               <input type="checkbox" name="food" value="African">African

Output:


             Chinese
             Western
             Indian
             African

How to create radio buttons: HTML

 Radio buttons are useful for selecting any one choice from options. Usually these are used inside html forms( <form> ... </from> ). You may have noticed such items during online exams and questionnaire, gender selection, favorite selection, etc. Here I'll show you an example radio button used for selecting my favorite car:

Syntax:

         <input type="radio" name="favorite" value="bmw">BMW<br/>
         <input type="radio" name="favorite" value="benz">Benz<br/>
         <input type="radio" name="favorite" value="audi">Audi<br/>
         <input type="radio" name="favorite" value="ferrari">Ferrari


Output

           BMW
           Benz
           Audi
           Ferrari

How to call sprite sheet animation: cocos2d

To add sprites from spritesheet and animating the frames, you can use the following code:

in .h:

        CCSprite *sprite_1;
        NSMutableArray *spriteAnimArray;

in .m:

    //In init method, add sprite frames from plist file
 
        [[CCSpriteFrameCache sharedSpriteFrameCache] addSpriteFramesWithFile:@"plistName.plist"]; 
         sprite_1 =[CCSprite spriteWithSpriteFrameName:@"sprite1.png"];
        sprite_1.position = ccp(240,240);
        [self addChild:sprite_1 z:2];

        [self spriteAnimation];        // call sprite animation function


  //SpriteAnimation function

    -(void)spriteAnimation{
        spriteAnimArray = [NSMutableArray new];

        // call sprite1 to sprite4 from spritesheet //
        for(int i=1; i<=4; s++)      
        {
            [spriteAnimArray addObject:[[CCSpriteFrameCache sharedSpriteFrameCache]
                                                spriteFrameByName:[NSString stringWithFormat:@"sprite%d.png",i]]];
        }
       
        CCAnimation *animate = [CCAnimation animationWithFrames:spriteAnimArray delay:0.3f];
        CCRepeat *sprite_Action = [CCRepeatForever actionWithAction:
                                                    [CCAnimate actionWithAnimation:animate
                                                    restoreOriginalFrame:YES]];       

        [sprite_1 runAction:sprite_Action];
        [spriteAnimArray release];
    }

Array and Array Operations: PHP


Array creation:

To initialize an array in PHP:

$names_1  = array();   
                       
To add value to that array:

$names_1[] = "Bob";   
$names_1[] = "Marley";
$names_1[] = "Alex";
$names_1[] = "David";

You can also construct an array as follows:

            $arr1 = array(10,30,10,20,50);
           
To print the created array:

            print_r($names);


Array operations:
                       
To convert a string to array:

            You can use ‘explode’ to split an string with characters and add each element to array as below:

$names_2 = "Bob,Marley,Alex,David";
                       
$names_3 = explode("," , $names_2);   //--> String to array
print_r($names_3);                                                      
                       
To convert a array to string:

            If you want to get the elements from the array, and convert it into a string with each array elements separated by a character [say coma ‘,’], then you can make use of PHP ‘implode’.

print(implode(",",$names_1));               //--> Array to string
 
To eliminate similar data/elements from an array (array_unique):

$arr1 = array(10,30,10,20,50);

                       
$arr1 = array_unique($arr1);    //--> To eliminate similar data from the array
 print_r($arr1);
                       
To sort and reverse sort an array (sort and rsort):

            sort($arr1);                               //--> To sort an array
print_r($arr1);
                       
            rsort($arr1);                             //--> To reverse-sort an array
            print_r($arr1);

To add/ concatenate two arrays (array_merge):
                       
            $arr_1 = array(10,30,10,20,50);
            $arr_2 = array("Leon","CEO",41);
                       
            $arr_3 = array_merge($arr_1,$arr_2);  //--> To concatenate 2 arrays
            print_r($arr_3);

           
To get index key of an array as an array:

$arr_4 = array("name"=>" Leon ","destination"=>"CEO","age"=>41);
            print_r($arr_4);                        //--> Array with key index
            print_r(array_keys($arr_4));     //--> To get the index keys as an array


To check whether an element is in an array:

            $arr_5 = array("apple","orange","mango","grape","peach");
                       
            if(in_array("orange",$arr_5)){
     //--> To check whether an element is in an array
                        echo "Element Found...";
            }

Saturday, 8 June 2013

Basic functions : PHP


Some of the basic functions and data manipulation in PHP are given below:
 
$str_1 = " DeveloperDK Blogspot ";
  • echo "DK_".$str_1."_DK";                // --> DK _ DeveloperDK Blogspot _ DK
  • echo "DK_".trim($str_1)."_DK";       // --> DK_ DeveloperDK Blogspot _DK
  • echo strtolower($str_1);                    // --> developerdk blogspot
  • echo strtoupper($str_1);                    // --> DEVELOPERDK BLOGSPOT 
                       
$str_2 = "developerdk Blogspot";
  • echo ucwords($str_2);                       // --> Developerdk Blogspot
                       
$str_3 = "deVeloperdk BloGspot";
  • echo ucwords(strtolower($str_3));                 // --> Developerdk Blogspot
  • echo substr($str_3,0,5);                                 // --> deVel
  • echo substr($str_3,0,-4);                               // --> deVeloperdk BloGspot
  • echo substr($str_3,4);                                    // --> loperdk BloGspot
  • echo substr($str_3,-4);                                  // --> spot
                       
$str_4 = "Developer";
$str_5 = 11;
  • echo is_string($str_4);                        // --> o/p : 1
  • echo is_string($str_5);                        // --> no o/p                    

$str_6 ="100.00";
  • echo intval($str_6);                            // --> 100
                       
$str_7 = 2.3;
  • echo is_float($str_7);                         // --> o/p : 1

How to print data : PHP

You can use 'echo' to print string, variables, etc. in php. 

Syntax:

        echo "print it...";                       // Output------------->  print it...
        echo '<br/>';                           // prints a new line/enter

        $var_1 = 10;
        $var_2 = 3.14;
        $var_3 = "myString";
        echo $var_1;                           //  Output (number)------->  10
        echo $var_3;                           //  Output (string)------->  myString
        echo "$var_1 + $var_2";         //  Output (sum number)-------> 13.14
       
       echo '$var_1 + $var_2';          //  Output (string)-------> $var_1 + $var_2
       
       echo "$var_1 + $var_2 = ".($var_1 + $var_2);  
       // Output ---------> $var_1 + $var_2 = 13.14


      Note: dot(.) character is used to concant/join strings in php.
 

Friday, 7 June 2013

How to check leap year: Objective C

            If you are an Objective C developer, who is going to make a calender type or something similar applications, then sometimes you may need to find out whether a year is leap year or not. You can use the following function to check whether a year is leap year or not.

Just pass the year to be checked (yearPassed) as an integer value to the following function. Then the function will check for leap year and it will return either 0 or 1 according to the conditions. If it returns 0, then the year is not a leap year. If it returns 1, then the year you passed to the function is a leap year.

Function syntax:

        -(int)leapYearCheck:(int )yearPassed{
               int isLeapYear = 0;
               int yearTocheck = yearPassed;
   
               if (yearTocheck%400 ==0) {
                          isLeapYear = 1;
               }else if (yearTocheck%100 ==0){
                         isLeapYear = 0;
               }else if (yearTocheck%4 ==0){
                         isLeapYear = 1;
               }else if(yearTocheck%4 != 0){
                        isLeapYear = 0;
               }
               return isLeapYear;
         }

Wednesday, 5 June 2013

How to change the image inside UIImageView programmatically: Xcode


In this tutorial, you are going to study how to change the images inside an UIImageView in button click.


 For that, first drag & drop 2 images(say Image1.png & Image2.png)to the project

in.h:

    @interface ViewController : UIViewController
    {
        IBOutlet UIImageView *imageView_;
    }
    -(IBAction)changeToimg1;
    -(IBAction)changeToimg2;
    @end

   
in.m:

    @implementation ViewController

    -(IBAction)changeToimg1
    {
        // This will set Image1.png as the UIImageView image
        UIImage *img1 = [UIImage imageNamed:@"Image1.png"];
        [imageView_ setImage:img1];
    }

    -(IBAction)changeToimg2
    {
        // This will set Image2.png as the UIImageView image
        UIImage *img2 = [UIImage imageNamed:@"Image2.png"];
        [imageView_ setImage:img2];
    }

   
in.xib:
  • Drag and drop UIImageView to the main window
  • Place 2 UIButtons on the screen, name the button labels as Image1 and Image2 respectively for your conveniance
  • Click on the imageView and co
               New Referencing Outlet   --->    imageView_
  • Click on Button1 and connect
               Touch Up Inside             ---->    changeToimg1
  •  Click on Button2 and connect   
               Touch Up Inside          ---->   changeToimg2


Now save and Run the program. Click on the buttons, and you can see the images changing.

Tuesday, 4 June 2013

How to call a function using NSTimer: Xcode

NSTimer can be used to call functions with a scheduled delay. You can control the interval and repeat mode (whether the function need to be called per every delay intervals or not) also. The syntax is very simple, and is given below:

Syntax:

         [NSTimer scheduledTimerWithTimeInterval:0.60
                                                                   target:self
                                                                   selector:@selector(myFunction)
                                                                   userInfo:nil
                                                                   repeats:NO];

How to create an UITableView: Xcode

Overview
     An instance of UITableView (or simply, a table view) is a means for displaying and editing hierarchical lists of information.


xib:

 Drag and drop tableView.
 Connect  tableView : dataSource   ---->     viewController/File's owner
                                  deligate         ---->     viewController/File's owner

in .h:

@interface ViewController : UIViewController <UITableViewDataSource,UITableViewDelegate>
{
     NSArray *exercises;
    UITableViewCell *cell;
}
@end

in .m:

@implementation ViewController
     
- (void)viewDidLoad
{
  //-----------create table list array-----------//
     exercises = [[NSArray alloc]initWithObjects:@"Name 1",@"Name 2",@"Name 3",@"Name 4",
                             @"Name 5",@"Name 6",@"Name 7",@"Name 8",@"Name 9",@"Name 10",nil];
   
     [super viewDidLoad];
}

 //Add table view delegates //

//------------delegate that decides the number of rows in table view--------------//        
- (NSInteger)tableView:(UITableView *)tableView numberOfRowsInSection:(NSInteger)section{
      return exercises.count;
}

//------------delegate decides the content of each table cell--------------//
- (UITableViewCell *)tableView:(UITableView *)tableView cellForRowAtIndexPath:(NSIndexPath *)indexPath{
      //-----------create a cell-----------//
        cell = [[UITableViewCell alloc]initWithStyle:UITableViewCellStyleDefault reuseIdentifier:@"cell"];
   
     //-----------fill it with contents-----------//
        cell.textLabel.text = [exercises objectAtIndex:indexPath.row];
           
     //-----------return it-----------//
        return cell;
}

//------------To get the touched cell val/name --------------//
 - (void)tableView:(UITableView *)tableView didSelectRowAtIndexPath:(NSIndexPath *)indexPath
{
        NSLog(@"Selected Row    %@",[exercises objectAtIndex:indexPath.row]);
}

//------------Table view swipe delete deligate(optional)------------//

                            For using this method, you have to add and connect IBOutlet to your table view (say myEditableTable), and load your table from an NSMutableArray (say exercises_Mutable). Then use the following method:


- (void)tableView:(UITableView *)tableView commitEditingStyle:(UITableViewCellEditingStyle)editingStyle forRowAtIndexPath:(NSIndexPath *)indexPath {
   
    if (editingStyle == UITableViewCellEditingStyleDelete) {
        // Repsond to delete
NSLog(@”Delete-à %@”, [exercises_Mutable objectAtIndex:indexPath.row]);
[exercises_Mutable removeObjectAtIndex: indexPath.row] ;
[myEditableTable reloadData];

    }    
}

Here, the ‘[exercises_Mutable removeObjectAtIndex: indexPath.row]’ will remove the clicked indexed element from your Mutable array, and ‘[myEditableTable reloadData]’ will reload the table with the changed array.

Optional : And if you want to change the text of the Delete button you can use the following syntax*/
                  tableView:titleForDeleteConfirmationButtonForRowAtIndexPath:


//------------To add an image to UITableViewCell(optional)------------//
-(void)tableView:(UITableView *)tableView willDisplayCell:(UITableViewCell *)cell forRowAtIndexPath:(NSIndexPath *)indexPath{
        cell.backgroundColor = [UIColor colorWithPatternImage:[UIImage imageNamed:@"myImage.png"]];
  }


//------------To change UITable view separator color and style(optional)------------//
 Separator is the straight line that separates each cell in a tableView. You have control over it's style and color. You can change those properties as follows:

        myTableView.separatorStyle=UITableViewCellSeparatorStyleSingleLine;
        myTableView.separatorColor = [UIColor brownColor];

How to create an alert view programmatically: cocos2d

Overview:

Use an activity indicator to show that a task is in progress. An activity indicator appears as a “gear” that is either spinning or stopped.

You control when an activity indicator animates by calling the startAnimating and stopAnimating methods. To automatically hide the activity indicator when animation stops, set the hidesWhenStopped property to YES.


  You can create the alert view programmatically as below:

// in .h //

    UIImageView *bgView;
    UIActivityIndicatorView *spin;

// in .m //

//  Call the following method in init/when the scene loads:
 -(void)createIndicator
    {
        spinnerAdded = TRUE;
        bgView = [[UIView alloc] initWithFrame:CGRectMake(0, 0, 140, 140)];
        bgView.backgroundColor = [UIColor colorWithRed:0.1 green:0.1 blue:0.1 alpha:0.8];
        bgView.layer.cornerRadius = 8.0;
        [[[CCDirector sharedDirector] openGLView] addSubview:bgView];
           
        spin = [[UIActivityIndicatorView alloc]initWithActivityIndicatorStyle:UIActivityIndicatorViewStyleWhiteLarge];
        [bgView addSubview:spin];
        [spin setHidesWhenStopped:YES];
        spin.center = CGPointMake(70, 70);
        [spin startAnimating];
        [spin release];
           
        UILabel *lbl = [[UILabel alloc] initWithFrame:CGRectMake(0, 105, bgView.frame.size.width, 15)];
        lbl.center = CGPointMake(bgView.frame.size.width/2, lbl.center.y);   
        [bgView addSubview:lbl];   
        [lbl setBackgroundColor:[UIColor clearColor]];   
        lbl.textAlignment = UITextAlignmentCenter;   
        [lbl setFont:[UIFont boldSystemFontOfSize:14]];   
        [lbl setTextColor:[UIColor whiteColor]];   
        lbl.text = @"Loading...";
    }


startAnimating:

     Starts the animation of the progress indicator. When the progress indicator is animated, the gear spins to indicate indeterminate progress. The indicator is animated until stopAnimating is called.

 Syntax:

                  [spin startAnimating];


stopAnimating:

     Stops the animation of the progress indicator.


  Syntax:

           [spin stopAnimating];
           [bgView removeFromSuperview];


UIActivityIndicatorStyle:

   The visual style of the progress indicator.

typedef enum {
   UIActivityIndicatorViewStyleWhiteLarge,
   UIActivityIndicatorViewStyleWhite,
   UIActivityIndicatorViewStyleGray,
} UIActivityIndicatorViewStyle;

How to check whether there is internet connection with the device: cocos2d/Xcode

You can check whether there is internet connection with the device/not with the help of following code:

     // in .h File //

        Import Reachability class.


    // in .m File //

        if([self connected] )
        {
            NSLog(@"Internet connected\n");
        }
       
        - (BOOL)connected
        {
            Reachability *reachability = [Reachability reachabilityForInternetConnection];
            NetworkStatus networkStatus = [reachability currentReachabilityStatus];
            return !(networkStatus == NotReachable);
        }

How to create iOS application badge: cocos2d/Xcode

In many iOS apps, you may have noticed the number indicator inside a red circle above the application icon. It is called icon badge or simply badge.


The badge is used mainly for indicating local or push notification messages. You can create the icon badge with desired number inside with a very easy, single line code as below:

Syntax:

        [UIApplication sharedApplication].applicationIconBadgeNumber = 23;

How to convert the normal textfield keyboard to e-mail keyboard:cocos2d/Xcode

 Mail keyboard or changing keyboardtype:

    mailField.keyboardType = UIKeyboardTypeEmailAddress; // where mailField is the text field

Monday, 3 June 2013

How to programmatically change the device orientation instantly: cocos2d

To change Device orientation instantly, use the following syntax:

Syntax:

    CCDirector *director = [CCDirector sharedDirector];
    [director setDeviceOrientation:kCCDeviceOrientationPortrait];  // set your desired orientation here

How to implement e-mail view - Landscape: cocos2d


// in .h File //

    #import <MessageUI/MFMailComposeViewController.h>
       
    @interface Game : CCLayer <MFMailComposeViewControllerDelegate>
    {
        NSString *emailTitle;
        NSString *emailBody;
        UIImage *emailImage;
        MFMailComposeViewController *picker;
    }
    -(void)showMailPicker;
    -(id)initWithTitle:(NSString *)title body:(NSString *)body image:(UIImage *)image;
     
    // in .m File //

       
    -(id)initWithTitle:(NSString *)title body:(NSString *)body image:(UIImage *)image
    {
        self = [super init];
        if (self != nil) {
            emailTitle = title;
            emailBody = body;
            emailImage = image;
            [self showMailPicker];
        }
        return self;
    }
       
    -(void)showMailPicker
    {
        picker = [[MFMailComposeViewController alloc] init];
        picker.mailComposeDelegate = self;
        picker.modalPresentationStyle = UIModalPresentationFullScreen;
        picker.modalTransitionStyle = UIModalTransitionStyleFlipHorizontal;
           
        [picker setSubject:emailTitle];
        [picker setMessageBody:emailBody isHTML:YES];
        picker.navigationBar.barStyle = UIBarStyleBlack;
           
        [[CCDirector sharedDirector] pause];
        UIViewController *rootViewController = (UIViewController *)[[[CCDirector sharedDirector] openGLView ] nextResponder];  // This will do it
           
        [rootViewController presentModalViewController:picker animated:YES];
        [picker release];
    }
       
    - (void)mailComposeController:(MFMailComposeViewController*)controller didFinishWithResult:(MFMailComposeResult)result error:(NSError*)error
    {
        [[CCDirector sharedDirector] resume];
        [controller dismissModalViewControllerAnimated: YES];
    }
       

How to implement e-mail view - Portrait: cocos2d

// in .h File //

    #import <MessageUI/MessageUI.h>
   
    @interface EmailScene : CCLayer <MFMailComposeViewControllerDelegate>
    {
        UIViewController * emailMe;
    }


// in .m File //

    #import "EmailScene.h"

    -(id) init
    {
        if( (self=[super init])) {
               
        CCMenuItemImage *Button_1 = [CCMenuItemImage
                                    itemFromNormalImage:@"Icon-72.png"
                                    selectedImage:@"i.png"
                                    target:self
                                    selector:@selector(emailCallback)];
               
        Button_1.position = ccp(160, 240);
               
        CCMenu *levelMenu = [CCMenu menuWithItems:Button_1, nil];
        levelMenu.position = ccp(0,0);
        [self addChild:levelMenu z:1];
               
               
        emailMe = [[UIViewController alloc] init];
        [[[CCDirector sharedDirector] openGLView] addSubview:emailMe.view];
               
        }
        return self;
    }
       
       
    -(void)emailCallback
    {
        [[CCDirector sharedDirector] pause];
        [[CCDirector sharedDirector] stopAnimation];
           
        MFMailComposeViewController *picker = [[MFMailComposeViewController alloc] init];
        picker.mailComposeDelegate = self;
       
        NSArray *toRecipient = [NSArray arrayWithObject:@"krishnaraj@schogini.com"];
        [picker setToRecipients:toRecipient];
       
        [picker setSubject:@"Email test "];
        [picker setMessageBody:@"finally its working " isHTML:YES];
        picker.navigationBar.barStyle = UIBarStyleBlack;
           
        [emailMe presentModalViewController:picker animated:YES];
        [picker release];
    }
       
    - (void)mailComposeController:(MFMailComposeViewController*)controller didFinishWithResult:(MFMailComposeResult)result error:(NSError*)error
    {
        [[CCDirector sharedDirector] resume];
        [[CCDirector sharedDirector] startAnimation];
           
        [controller dismissModalViewControllerAnimated:NO];
    }


This will do it.................... ;)

How to create/display UILabel programmatically:cocos2d

To create an UILabel in the scene, you can use the below code:

    // in .h File //

    UIView *profileView;
    UILabel *labelName;

    // in .m File //

    -(void)show_{

        // Create a UIView //
        profileView = [[UIView alloc] init];
        profileView.frame = CGRectMake(0, 0, 320, 480);
        profileView.backgroundColor = [UIColor blueColor];
        [[[CCDirector sharedDirector] openGLView] addSubview:profileView];

        // Create the UIlabel and add it to the UIView //
        labelName = [[UILabel alloc] init];
        labelName setText:[NSString stringWithFormat:@"%d",0]];
        labelName.frame = CGRectMake(0, 0,  35, 35);
        labelName.center = CGPointMake(160, 160);
        labelName.backgroundColor = [UIColor clearColor]; 
        labelName.textAlignment = NSTextAlignmentCenter;  
        [profileView addSubview:labelName];     
       
        //----------Line break for UIlabel(optional)----------//
        labelName.lineBreakMode = NSLineBreakByWordWrapping;
        labelName.numberOfLines = 0;
        //---------------------------------------------------//
    }

Get current date, month and year: cocos2d/Xcode

To get current date, month and year, you can use the following code:

    NSDate *now = [NSDate date];

    NSLog(@"now: %@", now); // now: 2011-02-28 09:57:49 +0000

    NSString *strDate = [[NSString alloc] initWithFormat:@"%@",now];
    NSArray *arr = [strDate componentsSeparatedByString:@" "];
    NSString *str;
    str = [arr objectAtIndex:0];
    NSLog(@"strdate: %@",str); // strdate: 2011-02-28

    NSArray *arr_my = [str componentsSeparatedByString:@"-"];

    NSInteger date = [[arr_my objectAtIndex:2] intValue];
    NSInteger month = [[arr_my objectAtIndex:1] intValue];
    NSInteger year = [[arr_my objectAtIndex:0] intValue];

    NSLog(@"year = %d", year); // year = 2011
    NSLog(@"month = %d", month); // month = 2
    NSLog(@"date = %d", date); // date = 2

How to create vertical scroll view programmatically: cocos2d

To create a vertical scroll view with items, create an UIVIew and add ScrollView to it and add items to that ScrollView:

// in .h File //

        UIView *profileView;
        UIScrollView *verticalScroll;   


// in .m File //

    -(void)show_{

        // Create a UI View //
        profileView = [[UIView alloc] init];
        profileView.frame = CGRectMake(0, 0, 320, 480);
        profileView.backgroundColor = [UIColor blueColor];
        [[[CCDirector sharedDirector] openGLView] addSubview:profileView];
   
        // Create a UIScroll View //
        verticalScroll = [[UIScrollView alloc] initWithFrame:CGRectMake(0, 0, 300, 420)];
        verticalScroll.backgroundColor = [UIColor yellowColor];
        verticalScroll.showsVerticalScrollIndicator = NO;
        verticalScroll.contentSize = CGSizeMake(300, 760);
        verticalScroll.center = CGPointMake(160, 250);
        verticalScroll.pagingEnabled = FALSE;
        [profileView addSubview:verticalScroll];
   
        // Create and add an UIImageView to the ScrollView //
        UIImageView *baseImg1 = [[UIImageView alloc] initWithFrame:CGRectMake(5, 20, 325, 65)];
        baseImg1.image = [UIImage imageNamed:@"imageName.png"];
        baseImg1.center =CGPointMake(150, 340);
        [verticalScroll addSubview:baseImg1];
        [baseImg1 release];
   
    }

Sunday, 2 June 2013

Using camera to take picture and save that to file: cocos2d

/* Using camera to take a photo */

    // in .h File //
        @interface HelloWorld : CCLayer <UIImagePickerControllerDelegate, UINavigationControllerDelegate>{
   
            UIImagePickerController *uip;
            UIImage *profileImage;
        }

    // in .m File //
        #import "AppDelegate.h"

        -(void)takePhoto{
            AppDelegate *appdel = [UIApplication sharedApplication].delegate;
   
            @try {
       
                uip = [[UIImagePickerController alloc] init] ;
                uip.sourceType = UIImagePickerControllerSourceTypeCamera;
                uip.allowsEditing = YES;
                uip.delegate = self;
            }
            @catch (NSException * e) {
                [uip release];
                uip = nil;
            }
            @finally {
                if(uip) {
                    [appdel.viewController presentModalViewController:uip animated:YES];
                }
            }
        }


    - (void)imagePickerController:(UIImagePickerController *)picker didFinishPickingMediaWithInfo:(NSDictionary *)info{
   
        profileImage=[info objectForKey:UIImagePickerControllerEditedImage];
        AppDelegate *appdel = [UIApplication sharedApplication].delegate;
        [appdel.viewController dismissModalViewControllerAnimated:YES];
        [uip release];
       
        [NSThread detachNewThreadSelector:@selector(writeImgToPath:) toTarget:self withObject:profileImage]; 
         
       
    }


// To write the image to file //
    -(void)writeImgToPath:(id)sender
    {
       
        NSAutoreleasePool *pool = [NSAutoreleasePool new];
        UIImage *image = sender;
        NSArray *pathArr = NSSearchPathForDirectoriesInDomains(NSDocumentDirectory,
                                                           NSUserDomainMask,
                                                           YES);
        CGSize size;
        int currentProfileIndex = 1
        NSString *path = [[pathArr objectAtIndex:0]
                      stringByAppendingPathComponent:[NSString stringWithFormat:@"Img_%d.png",currentProfileIndex]];           
       
        size = CGSizeMake(120, 120);
        UIGraphicsBeginImageContext(size);
        [image drawInRect:CGRectMake(0, 0, 120, 120)];
        image = UIGraphicsGetImageFromCurrentImageContext();
        UIGraphicsEndImageContext();
   
        NSData *data = UIImagePNGRepresentation(image);
        [data writeToFile:path atomically:YES];
        NSLog(@"Saved.....");
       
        CGRect r = CGRectMake(0, 0, 80, 80);
        UIGraphicsBeginImageContext(r.size);
   
        UIImage *img1;
   
        [image drawInRect:r];
        img1 = UIGraphicsGetImageFromCurrentImageContext();
        UIGraphicsEndImageContext();
       
        [pool release];
    }

How to read an image from file and display it in an UIImageView programmatically: cocos2d/Xcode

Reading an image from  file and displaying it on an ImageView is very siple as follows:

    -(void)CreateView{

        // Fetch saved image //

            NSArray *paths = NSSearchPathForDirectoriesInDomains(NSDocumentDirectory, NSUserDomainMask, YES);
            NSString *documentsDirectory = [paths objectAtIndex:0];
            NSString *imgPath = [documentsDirectory stringByAppendingPathComponent:[NSString stringWithFormat:@"Img_%d.png",currentProfileIndex]];
            UIImage *img_1 = [UIImage imageWithContentsOfFile:imgPath];

      
        // Create an UIView //
       
            UIView *bgView = [[UIView alloc] init];
            bgView.frame = CGRectMake(240, 160, 10, 10);
            bgView.backgroundColor = [UIColor clearColor];
            [[[CCDirector sharedDirector]openGLView] addSubview:bgView];   


       // Create an UIImageView and display to display the image //

            UIImageView *bgImg = [[UIImageView alloc] initWithFrame:CGRectMake(240, 160, 50, 50)];
            bgImg.image = img_1;                    // Set the saved image to the UIImageView
            bgImg.center = CGPointMake(100, 100);
            [bgView addSubview:bgImg];
        }

How to create UITextField programmatically: cocos2d/Xcode

In .h file:

        @interface SceneName : CCLayer <UITextFieldDelegate>
       
            UITextField *nameField;

In .m file:

   // To create UITextField and assigning properties//

        -(void)createTextField{
           // create a UIView here(say profileView). Then do the following code //

            nameField = [[UITextField alloc] initWithFrame:CGRectMake(5, 20, 150, 30)];
            nameField.center = CGPointMake(285, 120);
            nameField.backgroundColor = [UIColor whiteColor];
            nameField.textAlignment = UITextAlignmentCenter;
            nameField.delegate = self;
            [nameField.layer setBorderColor:[[UIColor redColor]CGColor]];
            [nameField.layer setBorderWidth:1];
            nameField.layer.cornerRadius = 8;
            nameField.contentVerticalAlignment = UIControlContentVerticalAlignmentCenter;
            [nameField addTarget:self action:@selector(valueChanged)
                                   forControlEvents:UIControlEventEditingChanged];
            [profileView addSubview:nameField];
        }

  
   // To resign first responder/keyboard //
   
        -(BOOL)textFieldShouldReturn:(UITextField *)textField
            {
                [textField resignFirstResponder];
                NSLog(@"%@ ",textField.text);                       // To get/print the data from the TextField
                return YES;
            }

        -(void)valueChanged{
            // To Limit text field text length //
            if ([nameField.text length] > 12) {
                nameField.text = [nameField.text substringToIndex:12];
            }
        }

    /*---------Some other important UITextField delegates---------*/
    -(BOOL) textField:(UITextField *)textField shouldChangeCharactersInRange:(NSRange)range replacementString:(NSString *)string{
        return YES;
    }

    - (BOOL) textFieldShouldBeginEditing:(UITextField *)textField{
        return YES;
    }

    - (void) textFieldDidBeginEditing:(UITextField *)textField
    {
   
    }
  

How to create and remove UIView and UIImageView programmatically: cocos2d

To create the UIView and UIImageView programmatically, you can use the following code:

To Create UIView:

        UIView *bgView = [[UIView alloc] init];
        bgView.frame = CGRectMake(0, 0, 480, 320);
        bgView.backgroundColor = [UIColor blueColor];
        [[[CCDirector sharedDirector]openGLView] addSubview:bgView];


To create UIImageView:

        UIImageView *bgImg = [[UIImageView alloc] initWithFrame:CGRectMake(0, 0, 480, 320)];
        bgImg.image = [UIImage imageNamed:@"certificate.png"];
        bgImg.center = CGPointMake(240, 160);
        [bgView addSubview:bgImg]; 


For removing UIViews:

        [bgView removeFromSuperview];
        [bgView release];
        [bgImg removeFromSuperview];
        [bgImg release];

How to get device orientation programmatically: cocos2d

Tho get the device orientation programmatically, you can use the following code:


    if([[UIDevice currentDevice] orientation] == kCCDeviceOrientationPortrait) {
        NSLog(@"Portrait");
    }
    else if ([[UIDevice currentDevice] orientation] == kCCDeviceOrientationLandscapeLeft) {
        NSLog(@"LandscapeLeft");
    }
    else if ([[UIDevice currentDevice] orientation] == kCCDeviceOrientationLandscapeRight) {
        NSLog(@"LandscapeRight");
    }
    else if ([[UIDevice currentDevice] orientation] == kCCDeviceOrientationPortraitUpsideDown) {
        NSLog(@"PortraitUpsideDown");
    }

How to remove frame rate display from the app: cocos2d

To get rid of the frames per second display in a Cocos2d app, you can use the following method.


First, just go to the AppDelegate.m and  find out where the following line resides
:

          [director setDisplayFPS:YES];

Then just comment the above line as:

        // [director setDisplayFPS:YES];        // This will remove the frame rates from the app

How to remove unused/all textures: cocos2d


Syntax for removing unused textures in cocos2d:


        [[CCTextureCache sharedTextureCache] removeUnusedTextures];


Syntax for removing all Texture:

        [[CCTextureCache sharedTextureCache] removeAllTextures];

How to change from one scene to another(scene transition): cocos2d

First import the next scene name in the implementation file:
    
     #import "newSceneName .m"


Then call the next scene using the following line:

    [[CCDirector sharedDirector] replaceScene:[newSceneName scene]];


There are also some special transitions available on cocos2d. some of the examples are give below:

        // For Transition radial clockwise
            [[CCDirector sharedDirector] replaceScene:
                    [CCTransitionRadialCW transitionWithDuration:1.0f scene:[newSceneName scene]]];

        // For Transition shrink grow
            [[CCDirector sharedDirector] replaceScene:
                    [CCTransitionShrinkGrow transitionWithDuration:1.0f scene:[newSceneName scene]]];

        // For Transition split rows
            [[CCDirector sharedDirector] replaceScene:
                    [CCTransitionSplitRows transitionWithDuration:1.0f scene:[newSceneName scene]]];

        // For Transition turn off tiles
            [[CCDirector sharedDirector] replaceScene:
                    [CCTransitionTurnOffTiles transitionWithDuration:1.0f scene:[newSceneName scene] ]];

        // For Transition zoom and flipping X with orientation
            [[CCDirector sharedDirector] replaceScene:
                    [CCTransitionZoomFlipX transitionWithDuration:1.0f
                    scene:[newSceneName scene] orientation:kOrientationRightOver]];