Saturday, 15 February 2014

How to change the background color of UIView with delay/animation: Xcode/cocos2d

We can change the background color of an UIView with delay as follows. This can be also used for many other UIElement animations such as changing the properties of an UIButton (such as textColor) with delay/animation.


 [UIView animateWithDuration:2.0 animations:^{
    [myView setBackgroundColor:[UIColor grayColor]];
 }
    

How to set UIImageView image with delay/animation: Xcode/Cocos2d

We can set the image of an UIImageView with delay/animation as follows:


[UIView transitionWithView:myImageView
                      duration:1.0
                       options:UIViewAnimationOptionTransitionCrossDissolve
                    animations:^{
                        myImageView.image = [UIImage imageNamed:@"newImage.png"];
                    } completion:nil];


Thursday, 9 January 2014

How to focus on last cell in a UITableview in Xcode


//Create a method to find out the last index of your table view and will focus to that cell with an animation:

-(void)autoFocusTableCell{
    NSIndexPath *lastIndexPath = [self lastIndexPath];
    [myTableView scrollToRowAtIndexPath:lastIndexPath
                       atScrollPosition:UITableViewScrollPositionBottom animated:YES];
}


//Code to find the last index of your tableview.
-(NSIndexPath *)lastIndexPath{
    NSInteger lastSectionIndex = MAX(0, [myTableView numberOfSections] - 1);
    NSInteger lastRowIndex = MAX(0, [myTableView numberOfRowsInSection:lastSectionIndex] - 1);
    return [NSIndexPath indexPathForRow:lastRowIndex inSection:lastSectionIndex];
}

//Then call the method
    [self autoFocusTableCell];
    

Tuesday, 24 December 2013

How to sort an array with respect to another

You can sort an array with respect to another easily by adding them to an NSDictionary and do as follows:
            
    // Put the two arrays into a dictionary as keys and values
    NSDictionary *dictionary = [NSDictionary 
                               dictionaryWithObjects:secondArray forKeys:firstArray];
    // Sort the first array
    NSArray *sortedFirstArray = [[dictionary allKeys]  
                               sortedArrayUsingSelector:@selector(compare:)];
    // Sort the second array based on the sorted first array

    NSArray *sortedSecondArray = [dictionary objectsForKeys:sortedFirstArray 
                                             notFoundMarker:[NSNull null]];

How to set an image at the left corner of an UIButton

Let button Frame is:

  myButton.frame = CGRectMake(0, 0, 80, 30);

            
To set an image at the left corner of an UIButton, do as follows:

  [myButton setImageEdgeInsets:UIEdgeInsetsMake(0, 30, 0, 80)];

Sunday, 24 November 2013

How to shuffle an NSMutableArray in an easy way

There are several methods to sort an NSMutableArray. Here we will give you a very simple method to shuffle your NSMutableArray. This method uses the default exchangeObjectAtIndex method to shuffle the array.

Lets initialise a mutable array and add some elements to it as below:

 // Initialising the NSMutableArray
   NSMutableArray *myArray = [[NSMutableArray alloc]init];

 // Add some objects to it (say 15, here) 
   for (int i=1; i<=15; i++) {
     [myArray addObject:[NSString stringWithFormat:@"%d",i]];
   }

Now you have an array with 15 objects/elements in it. Now for sorting the above array, you just need to use the following code:

 // Code for shuffling
  for (int i = 0; i < [myArray count]; ++i) {
    [myArray exchangeObjectAtIndex:i withObjectAtIndex:((random() % ([myArray count]-i)) + i)];
  }


Wednesday, 20 November 2013

How to set the master volume and individual channel volume in corona SDK


This tutorial will help you to change/adjust the volume of the music playing in your corona SDK application.

  • To set the master volume, you can simply call the following line:

  audio.setVolume( 0.5 )

This will setup the master volume to half. The value range from 0.0 (min.) to 1.0 (max.).


  • And, if you need to set the volume of an individual music channel, then you can use the following:
  audio.setVolume( 0.75, { channel=1 } ) 
This will control the volume of channel 1 (here, it will make the channel 1 volume to 3/4th of the default/full volume).

How to play background music in corona SDK application

This is a simple tutorial, which will teach you how to play background music in your corona SDK applications. 

First, load the music as:
  local backgroundMusic = audio.loadStream("bgMusic.mp3") 

Then you can play the music in loop as:

  local backgroundMusicChannel = audio.play( backgroundMusic, { channel=1,
                                                                                                              loop    s=-1,   
                                                                                                              fadein   =5000 })


where, channel is an integer value representing the music channel (0-32)

And if you want to stop the music, you can use:
  audio.stop( backgroundMusicChannel )

Tuesday, 5 November 2013

How to Install cocos2d in Xcode

Cocos2d is a powerful game engine, that can be added inside Xcode. It's installation steps are as simple as below:


  • Keep the downloaded file in your desktop.
  • Open terminal and type cd
  • Drag your latest version of cocos2d package into the terminal window.
  • Type sudo and open the cocos2d package, and drag the 'install-templates.sh' file into your terminal window. Then press 'Enter'.
  • Put your administrator password to install templates.
Now open your Xcode and see that the cocos2d has been successfully integrated. That's all...


How to hide status bar in iOS7

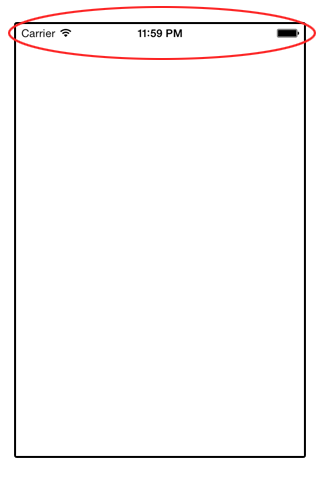
This post is about the UIStatusBar issue with the iOS 7, Xcode based applications. In your latest application, you can hide the UIStatusBar on application launch by selecting the Hide during application launch property as below:


But this isn't enough for hiding the ststusbar inside the app. That is, inside your iOS 7 app, you may see the status bar as it is:


For solving this, just do the following:
  • Open your info.plist
  • Add a row and name it as : View controller-based status bar appearance and set it to NO


That is: 

<key>UIStatusBarHidden</key>
<true/>
<key>UIViewControllerBasedStatusBarAppearance</key>
<false/>

We also attaching sample screenshot for your information:


Monday, 28 October 2013

How to fill a rectangle with gradient in corona SDK

Corona has a property called graphics.newGradient(), which will be useful for coloring/filling your rectangle with suitable color gradient.


-- First create the rectangle --
local myRectangle = display.newRect( 0, 0, 200, 200 )


-- Then create the gradient method --
local g = graphics.newGradient(
                            { 255, 255, 255 },     -- This is the first color array
                            { 200, 200, 200 },     -- This is the second color array
                             "down" )                  --[[ This is the gradient direction.
                                                                    Default is "down"
                                                                    Others are "up","right" and "left". --]]


-- Now fill your rectangle with the created gradient as: --
myRectangle:setFillColor( g )


How to check whether the testing device supports vibration facility in corona SDK

You may need to implement vibration feedbacks in many of your applications, especially in games and during warning alerts. In this chapter, you will learn about the a boolean key event to check whether your device supports vibrational feedback for your corona app. If this key event returns true,then your device will support vibration feedbacks, and if it returns false, then your device won't.


--  Function to trigger key event --
local function onKeyEvent( event )
    -- Vibrate the gamepad if its 'A' button was pressed.
    if (event.keyName == "button_A") and (event.phase == "down") then
        if event.device and event.device.canVibrate then
            event.device:vibrate()
        end
    end
end

Runtime:addEventListener( "key", onKeyEvent )


Note: This will not work with Android versions <= 4.0.

Saturday, 26 October 2013

How to repeat 2 backgrounds continuously forever in corona SDK game

In this tutorial, we will learn about how to repeat 2 backgrounds forever in our corona SDK game application. The code is as follows:

  
  -- Creating 2 images to run as background --

  local bg1 = display.newImageRect( "bg_1.png" ,480 ,320)
  bg1.x = display.contentWidth/2; bg1.y = display.contentHeight/2

  local bg2 = display.newImageRect( "bg_2.png" ,480 ,320 )
  bg2.x = bg1.x + bg1.width; bg2.y = display.contentHeight/2


-- Declaring a local variable to determine the movement speed --
  local speed = 30


-- Move Function --

  function move()
      bg1.x = bg1.x-speed;
      bg2.x = bg2.x-speed;

      if(bg1.x + bg1.width/2 < 0)then
        bg1.x = bg1.width*3/2-speed
      elseif(bg2.x + bg2.width/2 < 0)then
        bg2.x = bg2.width*3/2-speed
      end
  end
  Runtime:addEventListener( "enterFrame", move )


How to split complex strings in corona SDK

This session will teach you about splitting complex string of data separated with some characters. Lets assume that you have a string as House;home,40|Bed,20|Mirror,10. Now we will show you how to split each word and assigning each to a table.


  local myString = "House;home,40|Bed,20|Mirror,10"
  local myTable = {}
  for word in string.gmatch(myString, '([^,|]+)') do
     -- 'myTable' contains the data you need
    myTable[#myTable+1]=word print( myTable[#myTable] )
   end


Hence you will get the items as each table elements, as:
  
  myTable[1] = House
  myTable[2] = home
  myTable[3] = 40
  myTable[4] = Bed
  myTable[5] = 20
  myTable[6] = Mirror
  myTable[7] = 10

Friday, 23 August 2013

Different device Orientation in Corona SDK

In this tutorial, we will teach you: how to setup different supported orientations
for your Corona SDK application. These tricks are done in the build.settings file.
It will setup app orientation in relation to the device's physical orientation.
This also includes auto orientation triggered by the accelerometer, if the
device is flipped/rotated during runtime.

By this, you can set the orientation for:
    1) Launch image(splash screen).
    2) Native UI elements(like alerts, native keyboard,etc).
    3) The Corona display stage.
   
We will show you some of the examples in different orientations.

Example 1: Only landscapeLeft
 

    settings =
        {
            orientation =
            {
                default = "landscapeRight",
            },
        }


Example 2: Both landscapeLeft and landscapeRight


    settings =
    {
        orientation =
        {
            default = "landscapeRight",
            supported = { "landscapeLeft", "landscapeRight" },
        },
    }


Example 3: Only portrait    


    settings =
        {
            orientation =
            {
                default = "portrait",
            },
        }


Example 4: Both portrait and portraitUpsideDown


    settings =
    {
        orientation =
        {
            default = "portrait",
            supported = { "portrait", "portraitUpsideDown" },
        },
    }


Sunday, 18 August 2013

How to create widget button in corona DSK

In this tutorial, we will teach you the method of creating Widget button in your Corona SDK application.

First of all, you need to download the following 2 images and keep it with your 'main.lua'.


myButton_normal.png
 

myButton_press.png


Name the first button as: myButton_normal.png
and name the second as: myButton_press.png

Now we can start coding. Lets open main.lua. In the top of your code, require 'widget' as follows:


    local widget = require( "widget" )  


Now create a label to display the button events:
  
    local myText = display.newText( "Click on the buttons.", 0, 0,nil, 18 )
    myText.x, myText.y = display.contentCenterX, 70


Now we have to create the functions triggered by the buttons:

    local button1Press = function( event )
        myText.text = "Button 1 pressed"
    end

    local button1Release = function( event )
        myText.text = "Button 1 released"
    end

    local buttonHandler = function( event )
        myText.text = "id = " .. event.target.id .. ", phase = " .. event.phase
    end


Then just create first button as follows. This button has individual press and release functions.


    local button1 = widget.newButton{
        defaultFile = "myButton_normal.png",
        overFile = "myButton_press.png",
        onPress = button1Press,
        onRelease = button1Release,
        label = "Button 1 Label",
        emboss = true
    }

    button1.x = 160; button1.y = 160


Now we are going to create the second button. This has a single event handler function.

    
    local button2 = widget.newButton{
        defaultFile = "myButton_normal.png",
        overFile = "myButton_press.png",
        onEvent = buttonHandler,
        label = "Button 2 Label",
        id="myButton_2",
        emboss = true
    }
    button2.x = 160; button2.y = 240


 Now, save and run your application. You can see the event label and two buttons. Perform Touch, Drag and Release on the buttons and check it with the label.

Note: Please update your corona SDK version to include all new widget features.


How to get the device information using corona SDK

In some section of coding, you may need be to find out the current device specifications that you are using to run your corona applications. This article is about how to find out basic device information programmatically for your application using Corona SDK. Lets look at the following sample, it can help you for sure:


 To get the device Name:
        
  print("Name:"..system.getInfo( "name" ))


To get the device Model:

    print("Model:"..system.getInfo( "model" ))


To get the device Environment:

    print("Env:"..system.getInfo( "environment" ))


To get the Platform Name:

    print("Plat:"..system.getInfo( "platformName" ))


To get the Platform Version:

    print("Plat. ver:"..system.getInfo( "platformVersion" ))


To get the device Version:

    print("Ver:"..system.getInfo( "version" ))

To get the device Build:

    print("Build:"..system.getInfo( "build" ))

To get the Device ID:

    print("Dev ID:"..system.getInfo( "deviceID" ))


To get the device Language Code:

    print("Language code:"..system.getPreference( "ui", "language" ))


To get the Country:
   
  print("Country:"..system.getPreference( "locale", "country" ))


To get the Identifier:

    print("Identifier:"..system.getPreference( "locale", "identifier" ))


To get the device Language:
    
  print("Language:"..system.getPreference( "locale", "language" ))


Thursday, 15 August 2013

How to create global objects in your corona SDK game

In this tutorial, we will teach you how to make global objects with it's own listeners and properties, and are accessible to any class in your game with corona SDK. Here the director class is used to change from scene to scene.

Here I have my .lua  files: main, status and menu. First, lets start with the main.lua. Do the followings in your main:

main.lua


     local director=require("director")
     local maingroup=display.newGroup()
     maingroup:insert(director.directorView)
     director:changeScene("menu")
     return maingroup 
                                                                                   

Here, we can see that the director class is loaded, and a main displayGroup is created. Next we need to create a class which contains our global object. I am naming that class as 'status.lua'. Here we can create the object method with its certain object with listener and properties and while calling the method, you can return the object to any scene in your game/application. Just look at the status.lua class:

status.lua
                                                                                

    local function myObject(group,x,y,imagePath)

      local image = display.newImage( imagePath )
      image.x, image.y = x, y
      group:insert( image )

      -- We can even add properties as below--
      transition.to(image, {time=1000, x=160, y=300, transition=easing.inOutQuad}) 

      -- Adding Listener --
      image:addEventListener("touch", function() print("imageClicked") end )
    end

    local status = { myObject = myObject }

    return status
                                                                               

Now we can create our menu scene, which is the menu.lua. Here we have to require the object page ('status') and have to call the object method in the page to get the object in current scene, as follows:

menu.lua


module(...,package.seeall)

function new()

    -- require object page --
    local status = require "status"

    -- create a display group --
    local localGroup = display.newGroup()

    -- call object --
    status.myObject(localGroup, 160, 80, "muImage.png")

 return localGroup
end
                                                                               

Now save your files and run the app in the simulator/device to see what happens...

Wednesday, 7 August 2013

How to create a native alert view using corona SDK


The below function defines the two alert button ('Learn More' & 'OK') actions:

local function onClick(e) 
    if e.action == "clicked" then 
        if e.index == 1 then 
            -- Do something
        elseif e.index == 2 then 
            system.openURL( "http://devblogdk.blogspot.in/" ) 
        end 
    end 
end 

The below code generates the native alertview with title, subject and two buttons:

local alert = native.showAlert("Welcome", "Development Tutorials on DevBlogDK", {"OK", "Learn More"}, onClick)

How to get the largest integer smaller than or equal to a given number in corona SDK

We can find out the largest integer smaller than or equal to a given number using math.floor(). 

Syntax:
   
    math.floor()
   
Example:

    print(math.floor(0.5))    --->     0
    print(math.floor(-0.5))  --->     -1