Tuesday, 24 December 2013

How to sort an array with respect to another

You can sort an array with respect to another easily by adding them to an NSDictionary and do as follows:
            
    // Put the two arrays into a dictionary as keys and values
    NSDictionary *dictionary = [NSDictionary 
                               dictionaryWithObjects:secondArray forKeys:firstArray];
    // Sort the first array
    NSArray *sortedFirstArray = [[dictionary allKeys]  
                               sortedArrayUsingSelector:@selector(compare:)];
    // Sort the second array based on the sorted first array

    NSArray *sortedSecondArray = [dictionary objectsForKeys:sortedFirstArray 
                                             notFoundMarker:[NSNull null]];

How to set an image at the left corner of an UIButton

Let button Frame is:

  myButton.frame = CGRectMake(008030);

            
To set an image at the left corner of an UIButton, do as follows:

  [myButton setImageEdgeInsets:UIEdgeInsetsMake(030080)];

Sunday, 24 November 2013

How to shuffle an NSMutableArray in an easy way

There are several methods to sort an NSMutableArray. Here we will give you a very simple method to shuffle your NSMutableArray. This method uses the default exchangeObjectAtIndex method to shuffle the array.

Lets initialise a mutable array and add some elements to it as below:

 // Initialising the NSMutableArray
   NSMutableArray *myArray = [[NSMutableArray alloc]init];

 // Add some objects to it (say 15, here) 
   for (int i=1; i<=15; i++) {
     [myArray addObject:[NSString stringWithFormat:@"%d",i]];
   }

Now you have an array with 15 objects/elements in it. Now for sorting the above array, you just need to use the following code:

 // Code for shuffling
  for (int i = 0; i < [myArray count]; ++i) {
    [myArray exchangeObjectAtIndex:i withObjectAtIndex:((random() % ([myArray count]-i)) + i)];
  }


Wednesday, 20 November 2013

How to set the master volume and individual channel volume in corona SDK


This tutorial will help you to change/adjust the volume of the music playing in your corona SDK application.

  • To set the master volume, you can simply call the following line:

  audio.setVolume( 0.5 )

This will setup the master volume to half. The value range from 0.0 (min.) to 1.0 (max.).


  • And, if you need to set the volume of an individual music channel, then you can use the following:
  audio.setVolume( 0.75, { channel=1 } ) 
This will control the volume of channel 1 (here, it will make the channel 1 volume to 3/4th of the default/full volume).

How to play background music in corona SDK application

This is a simple tutorial, which will teach you how to play background music in your corona SDK applications. 

First, load the music as:
  local backgroundMusic = audio.loadStream("bgMusic.mp3") 

Then you can play the music in loop as:

  local backgroundMusicChannel = audio.play( backgroundMusic, { channel=1,
                                                                                                              loop    s=-1,   
                                                                                                              fadein   =5000 })


where, channel is an integer value representing the music channel (0-32)

And if you want to stop the music, you can use:
  audio.stop( backgroundMusicChannel )

Tuesday, 5 November 2013

How to Install cocos2d in Xcode

Cocos2d is a powerful game engine, that can be added inside Xcode. It's installation steps are as simple as below:


  • Keep the downloaded file in your desktop.
  • Open terminal and type cd
  • Drag your latest version of cocos2d package into the terminal window.
  • Type sudo and open the cocos2d package, and drag the 'install-templates.sh' file into your terminal window. Then press 'Enter'.
  • Put your administrator password to install templates.
Now open your Xcode and see that the cocos2d has been successfully integrated. That's all...


How to hide status bar in iOS7

This post is about the UIStatusBar issue with the iOS 7, Xcode based applications. In your latest application, you can hide the UIStatusBar on application launch by selecting the Hide during application launch property as below:


But this isn't enough for hiding the ststusbar inside the app. That is, inside your iOS 7 app, you may see the status bar as it is:


For solving this, just do the following:
  • Open your info.plist
  • Add a row and name it as : View controller-based status bar appearance and set it to NO


That is: 

<key>UIStatusBarHidden</key>
<true/>
<key>UIViewControllerBasedStatusBarAppearance</key>
<false/>

We also attaching sample screenshot for your information:


Monday, 28 October 2013

How to fill a rectangle with gradient in corona SDK

Corona has a property called graphics.newGradient(), which will be useful for coloring/filling your rectangle with suitable color gradient.


-- First create the rectangle --
local myRectangle = display.newRect( 0, 0, 200, 200 )


-- Then create the gradient method --
local g = graphics.newGradient(
                            { 255, 255, 255 },     -- This is the first color array
                            { 200, 200, 200 },     -- This is the second color array
                             "down" )                  --[[ This is the gradient direction.
                                                                    Default is "down"
                                                                    Others are "up","right" and "left". --]]


-- Now fill your rectangle with the created gradient as: --
myRectangle:setFillColor( g )


How to check whether the testing device supports vibration facility in corona SDK

You may need to implement vibration feedbacks in many of your applications, especially in games and during warning alerts. In this chapter, you will learn about the a boolean key event to check whether your device supports vibrational feedback for your corona app. If this key event returns true,then your device will support vibration feedbacks, and if it returns false, then your device won't.


--  Function to trigger key event --
local function onKeyEvent( event )
    -- Vibrate the gamepad if its 'A' button was pressed.
    if (event.keyName == "button_A") and (event.phase == "down") then
        if event.device and event.device.canVibrate then
            event.device:vibrate()
        end
    end
end

Runtime:addEventListener( "key", onKeyEvent )


Note: This will not work with Android versions <= 4.0.

Saturday, 26 October 2013

How to repeat 2 backgrounds continuously forever in corona SDK game

In this tutorial, we will learn about how to repeat 2 backgrounds forever in our corona SDK game application. The code is as follows:

  
  -- Creating 2 images to run as background --

  local bg1 = display.newImageRect( "bg_1.png" ,480 ,320)
  bg1.x = display.contentWidth/2; bg1.y = display.contentHeight/2

  local bg2 = display.newImageRect( "bg_2.png" ,480 ,320 )
  bg2.x = bg1.x + bg1.width; bg2.y = display.contentHeight/2


-- Declaring a local variable to determine the movement speed --
  local speed = 30


-- Move Function --

  function move()
      bg1.x = bg1.x-speed;
      bg2.x = bg2.x-speed;

      if(bg1.x + bg1.width/2 < 0)then
        bg1.x = bg1.width*3/2-speed
      elseif(bg2.x + bg2.width/2 < 0)then
        bg2.x = bg2.width*3/2-speed
      end
  end
  Runtime:addEventListener( "enterFrame", move )


How to split complex strings in corona SDK

This session will teach you about splitting complex string of data separated with some characters. Lets assume that you have a string as House;home,40|Bed,20|Mirror,10. Now we will show you how to split each word and assigning each to a table.


  local myString = "House;home,40|Bed,20|Mirror,10"
  local myTable = {}
  for word in string.gmatch(myString, '([^,|]+)') do
     -- 'myTable' contains the data you need
    myTable[#myTable+1]=word print( myTable[#myTable] )
   end


Hence you will get the items as each table elements, as:
  
  myTable[1] = House
  myTable[2] = home
  myTable[3] = 40
  myTable[4] = Bed
  myTable[5] = 20
  myTable[6] = Mirror
  myTable[7] = 10

Friday, 23 August 2013

Different device Orientation in Corona SDK

In this tutorial, we will teach you: how to setup different supported orientations
for your Corona SDK application. These tricks are done in the build.settings file.
It will setup app orientation in relation to the device's physical orientation.
This also includes auto orientation triggered by the accelerometer, if the
device is flipped/rotated during runtime.

By this, you can set the orientation for:
    1) Launch image(splash screen).
    2) Native UI elements(like alerts, native keyboard,etc).
    3) The Corona display stage.
   
We will show you some of the examples in different orientations.

Example 1: Only landscapeLeft
 

    settings =
        {
            orientation =
            {
                default = "landscapeRight",
            },
        }


Example 2: Both landscapeLeft and landscapeRight


    settings =
    {
        orientation =
        {
            default = "landscapeRight",
            supported = { "landscapeLeft", "landscapeRight" },
        },
    }


Example 3: Only portrait    


    settings =
        {
            orientation =
            {
                default = "portrait",
            },
        }


Example 4: Both portrait and portraitUpsideDown


    settings =
    {
        orientation =
        {
            default = "portrait",
            supported = { "portrait", "portraitUpsideDown" },
        },
    }


Sunday, 18 August 2013

How to create widget button in corona DSK

In this tutorial, we will teach you the method of creating Widget button in your Corona SDK application.

First of all, you need to download the following 2 images and keep it with your 'main.lua'.


myButton_normal.png
 

myButton_press.png


Name the first button as: myButton_normal.png
and name the second as: myButton_press.png

Now we can start coding. Lets open main.lua. In the top of your code, require 'widget' as follows:


    local widget = require( "widget" )  


Now create a label to display the button events:
  
    local myText = display.newText( "Click on the buttons.", 0, 0,nil, 18 )
    myText.x, myText.y = display.contentCenterX, 70


Now we have to create the functions triggered by the buttons:

    local button1Press = function( event )
        myText.text = "Button 1 pressed"
    end

    local button1Release = function( event )
        myText.text = "Button 1 released"
    end

    local buttonHandler = function( event )
        myText.text = "id = " .. event.target.id .. ", phase = " .. event.phase
    end


Then just create first button as follows. This button has individual press and release functions.


    local button1 = widget.newButton{
        defaultFile = "myButton_normal.png",
        overFile = "myButton_press.png",
        onPress = button1Press,
        onRelease = button1Release,
        label = "Button 1 Label",
        emboss = true
    }

    button1.x = 160; button1.y = 160


Now we are going to create the second button. This has a single event handler function.

    
    local button2 = widget.newButton{
        defaultFile = "myButton_normal.png",
        overFile = "myButton_press.png",
        onEvent = buttonHandler,
        label = "Button 2 Label",
        id="myButton_2",
        emboss = true
    }
    button2.x = 160; button2.y = 240


 Now, save and run your application. You can see the event label and two buttons. Perform Touch, Drag and Release on the buttons and check it with the label.

Note: Please update your corona SDK version to include all new widget features.


How to get the device information using corona SDK

In some section of coding, you may need be to find out the current device specifications that you are using to run your corona applications. This article is about how to find out basic device information programmatically for your application using Corona SDK. Lets look at the following sample, it can help you for sure:


 To get the device Name:
        
  print("Name:"..system.getInfo( "name" ))


To get the device Model:

    print("Model:"..system.getInfo( "model" ))


To get the device Environment:

    print("Env:"..system.getInfo( "environment" ))


To get the Platform Name:

    print("Plat:"..system.getInfo( "platformName" ))


To get the Platform Version:

    print("Plat. ver:"..system.getInfo( "platformVersion" ))


To get the device Version:

    print("Ver:"..system.getInfo( "version" ))

To get the device Build:

    print("Build:"..system.getInfo( "build" ))

To get the Device ID:

    print("Dev ID:"..system.getInfo( "deviceID" ))


To get the device Language Code:

    print("Language code:"..system.getPreference( "ui", "language" ))


To get the Country:
   
  print("Country:"..system.getPreference( "locale", "country" ))


To get the Identifier:

    print("Identifier:"..system.getPreference( "locale", "identifier" ))


To get the device Language:
    
  print("Language:"..system.getPreference( "locale", "language" ))


Thursday, 15 August 2013

How to create global objects in your corona SDK game

In this tutorial, we will teach you how to make global objects with it's own listeners and properties, and are accessible to any class in your game with corona SDK. Here the director class is used to change from scene to scene.

Here I have my .lua  files: main, status and menu. First, lets start with the main.lua. Do the followings in your main:

main.lua


     local director=require("director")
     local maingroup=display.newGroup()
     maingroup:insert(director.directorView)
     director:changeScene("menu")
     return maingroup 
                                                                                   

Here, we can see that the director class is loaded, and a main displayGroup is created. Next we need to create a class which contains our global object. I am naming that class as 'status.lua'. Here we can create the object method with its certain object with listener and properties and while calling the method, you can return the object to any scene in your game/application. Just look at the status.lua class:

status.lua
                                                                                

    local function myObject(group,x,y,imagePath)

      local image = display.newImage( imagePath )
      image.x, image.y = x, y
      group:insert( image )

      -- We can even add properties as below--
      transition.to(image, {time=1000, x=160, y=300, transition=easing.inOutQuad}) 

      -- Adding Listener --
      image:addEventListener("touch", function() print("imageClicked") end )
    end

    local status = { myObject = myObject }

    return status
                                                                               

Now we can create our menu scene, which is the menu.lua. Here we have to require the object page ('status') and have to call the object method in the page to get the object in current scene, as follows:

menu.lua


module(...,package.seeall)

function new()

    -- require object page --
    local status = require "status"

    -- create a display group --
    local localGroup = display.newGroup()

    -- call object --
    status.myObject(localGroup, 160, 80, "muImage.png")

 return localGroup
end
                                                                               

Now save your files and run the app in the simulator/device to see what happens...

Wednesday, 7 August 2013

How to create a native alert view using corona SDK


The below function defines the two alert button ('Learn More' & 'OK') actions:

local function onClick(e) 
    if e.action == "clicked" then 
        if e.index == 1 then 
            -- Do something
        elseif e.index == 2 then 
            system.openURL( "http://devblogdk.blogspot.in/" ) 
        end 
    end 
end 

The below code generates the native alertview with title, subject and two buttons:

local alert = native.showAlert("Welcome", "Development Tutorials on DevBlogDK", {"OK", "Learn More"}, onClick)

How to get the largest integer smaller than or equal to a given number in corona SDK

We can find out the largest integer smaller than or equal to a given number using math.floor(). 

Syntax:
   
    math.floor()
   
Example:

    print(math.floor(0.5))    --->     0
    print(math.floor(-0.5))  --->     -1

How to generate a random number in corona SDK

We can use math.random() for the purpose of generating random numbers in corona SDK.
There are 3 main types for this call. They are:

1) Witout any argument:
        math.random()
        -- This will return a pseudo random number in the range of [0,1)
   
2) With one argument:
        math.random(a)
        -- This will return a pseudo random number in the range of [0,a]
   
        eg: print(math.random(5))  ----> return a number between 1 and 5 (both inclusive)
   
3) With two arguments:
        math.random(a,b)
        -- This will return a pseudo random number in the range of [a,b]
   
        eg: print(math.random(2,10))  ----> return a number between 2 and 10 (both inclusive)

Tuesday, 30 July 2013

How to load a remote image to your application screen using Corona SDK

 Is it possible to load a picture that is located on a server, and display it on your application screen using corona SDK..? Yes it is...
You can use the following code for achieving this:

local function networkListener( event )
        if ( event.isError ) then
                print ( "Network error - download failed" )
        else
                event.target.alpha = 0
                transition.to( event.target, { alpha = 1.0 } )
        end

        print ( "RESPONSE: " .. event.response )
end

display.loadRemoteImage( "http://goo.gl/FsRnwu", "GET", networkListener, "banner.png", system.TemporaryDirectory, 25, 50 )

Monday, 29 July 2013

How to launch camera in your iOS app using corona SDK

You may need to use the camera in several applications to take photos/videos. In corona SDK, you can launch device camera using the following code:

    local onComplete = function(event)
            local photo = event.target
            print( "photo w,h = " .. photo.width .. "," .. photo.height )
    end
    media.show( media.Camera, onComplete )

Sunday, 28 July 2013

How to create a widget button in Corona SDK

Creating a widget button in corona, with a button press effect and a function call is as simple as below:


-- First, require 'widget' --
local widget = require("widget")

-- Create the button --
local myButton = widget.newButton{
    default = "normalImage.png",
    over = "pressedImage.png",
    width = 200, height = 200,
    onRelease = myButtonClickFunction
}

-- Position the button --
myButton.x = display.contentWidth/2
myButton.y = display.contentHeight/2

-- Then create the function you need to trigger on the button press --

function myButtonClickFunction()
    print("myButton is pressed...")
end


Touch listener in Corona SDK

We can assign touch listener to an object in corona as follows:


-- Create the object --
local rect = display.newRect(100,100,50,50)
rect:setFillColor(255,0,0)

-- Create the touch function --
local function myTouchFunction(event)
    if(e.phase=="began")then
         print("Touch begins...")
    elseif(e.phase=="moved")then
         print("Touch moved...")
    elseif(e.phase=="ended")then
         print("Touch ended...")
    end
end

-- Create the listener to the object --
rect:addEventListener("touch",myTouchFunction)


Wednesday, 24 July 2013

How to capture whole screen in Corona SDK

You can use the following lines of code to capture the device screen in Corona SDK. This will save the screenshot as: Picture 1.png, Picture 2.png, etc in the sandbox, and will show it on the screen with half size(if you do not need this, you can remove it by calling captured_image:removeSelf() and captured_image=nil). It can save upto 10000 files.

Syntax:

    local function captureDeviceScreen()
       local captured_image = display.captureScreen( true )
       captured_image:scale(.5,.5)
       local alert = native.showAlert( "Success", "Captured Image is Saved to Library", { "OK" } )
    end
    Runtime:addEventListener("tap",captureDeviceScreen)


And if you want to save the image with desired name, then you can refer the following post:

How to mail a screen captured image using corona SDK


How to zoom in an object and zoom back to normal state in Corona SDK

In Cocos2d you can easily scale an object within two values. For example, you can scale an object to 0.2, and can restore it to 1, whenever you need. But in Corona, if you scale to an object to a value of 0.2, and try and rescale to 1, it keeps it as 0.2. Because, in corona SDK, when you scale an object to a value other than 1, the system will take the new scaled value as the fullscale of the object. So, here we will teach you a simple technique to scale/zoom in and out an object in corona SDK.

1: Create a scaleFactor :

               local scaleFactor = 0.2;

2: When you want to zoom out, do :

               myObject:scale(scaleFactor ,scaleFactor )

3: When you want to zoom in, do :

              myObject:scale(1/scaleFactor ,1/scaleFactor )


Auto-change the physics of an object (created using Physics Editor) after a change of it's size in corona SDK

If you are using physics editor for making physics objects in your corona game, then at some point you may doubted about how to scale the physics area according to the sprite scale values... But it is very simple.

For doing such alternation, there is scaleFactor provided. You can assign physics to the object with this scale factor, as below:

    local scaleFactor = 1.0
    local physicsData = (require "shapedefs").physicsData(scaleFactor)
    local shape = display.newImage("objectname.png")
    physics.addBody( shape, physicsData:get("objectname") )


And when you change the scaleFactor, the size of physics area will automatically change.

How to mail a screen captured image using corona SDK

For doing this, you have to:
  • First create a localgroup.
  • Then add the screen objects to that group.
  • Return the display group
  • Use display.save to save the entire group displayed.
  • Create mail option and add attachment image from baseDirectory
  • Call mail Popup
Example

-- creating the display group --
local localGroup = display.newGroup()  

-- creating display objects and adding it to the group --
local bg = display.newRect(0,0,320,480)
bg.x = 160
bg.y = 240
bg:setFillColor(150)
localGroup:insert(bg)

local rect = display.newRect(0,0,50,50)
rect.x = 30+math.random(260)
rect.y = 30+math.random(420)
localGroup:insert(rect)

-- Then do as follows --
local function takePhotoAndSendMail()
  -- take screen shot to baseDirectory --
  local baseDir = system.DocumentsDirectory
  display.save( localGroup, "myScreenshot.jpg", baseDir )

  -- Create mail options --
  local options =
  {
    to = { "devblogdk@gmail.com",},
    subject = "My Level",
    body = "Add this...",
    attachment =
    {
      { baseDir=system.DocumentsDirectory, filename="myScreenshot.jpg", 
        type="image" },
    },
  }

  -- Send mail --
  native.showPopup("mail", options)
end
rect:addEventListener("tap",takePhotoAndSendMail)

Wednesday, 26 June 2013

How to create SegmentedControlButton to change color of textfield-text in Xcode

 Here, we will teach you how to make a segmented control button with 3 segments, and how it can be used for changing color of text in an UITextfield.


in .h:

        @interface ViewController : UIViewController{
            IBOutlet UISegmentedControl *colorChooser;
            IBOutlet UITextView *sampleText;
        }
        @property(nonatomic, retain) UISegmentedControl *colorChooser;
        @property(nonatomic, retain) UITextView *sampleText;

        -(IBAction)colorChanged;
        @end

in .m:

        @implementation ViewController

        @synthesize colorChooser,sampleText;

        -(IBAction)colorChanged{
            if (colorChooser.selectedSegmentIndex==0)sampleText.textColor= [UIColor blackColor];
            if (colorChooser.selectedSegmentIndex==1)sampleText.textColor= [UIColor blueColor];
            if (colorChooser.selectedSegmentIndex==2)sampleText.textColor= [UIColor redColor];
   
        }
in xib:
 
  • Drag and drop a segmented control view, and make it a 3 segmented one.
  • Drag and drop a text view
  • From "Connections inspector-window", connect:
                          Segmented Control : Value Changed            ---->colorChanged
                          Segmented Control : New referencing outlet ---->colorChooser
                          TextView          : New referencing outlet       ---->sampleText 


Now Build and Run the application. You can see the text field and 3 segmented button. Click on each segment and see the change in color of the textfield text.


Tuesday, 18 June 2013

How to add popUp/popOut like effects to UIVIew in cocos2d

You may have noticed the popUp and popOut effects of UIAlertView. We can even add such effects to our custom UIViews also. In this tutorial, we will teach you how to add popUp/popOut like effects to UIVIew in your cocos2d application.


in .h:

         UIView *profileView;


in .m:


    //First Create the UIView, and assign its alpha value to zero in the init method
        profileView = [[UIView alloc] init];
        profileView.frame = CGRectMake(50, 50, 270, 430);
        profileView.backgroundColor = [UIColor blueColor];
        profileView.alpha = 0;
        [[[CCDirector sharedDirector] openGLView] addSubview:profileView];

    // Call this function for Fade-In/PopUp
    -(void)effectFunction_FadeIn{
        profileView.transform = CGAffineTransformMakeScale(1.3, 1.3);
        profileView.alpha = 0;
        [UIView animateWithDuration:.35 animations:^{
            profileView.alpha = 1;
            profileView.transform = CGAffineTransformMakeScale(1, 1);
        }];
    }

    // Call this function for Fade-Out/PopOut
    -(void)effectFunction_FadeOut{
        profileView.transform = CGAffineTransformMakeScale(1.3, 1.3);
        profileView.alpha = 1;
        [UIView animateWithDuration:.35 animations:^{
            profileView.alpha = 0;
            profileView.transform = CGAffineTransformMakeScale(1, 1);
        }];
    }

Monday, 17 June 2013

How to create UISwitch programatically in cocos2d

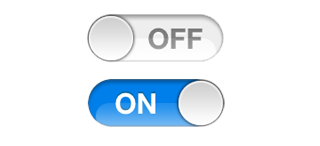
UISwitch is mainly used for representing two states. Normal UISwitch has 2 states: ON and OFF respectively.


Creating UISwitch in your cocos2d application is very simple. The steps for creating an UISwitch is described below:
       
First create an UIView:

        UIView *profileView = [[UIView alloc] init];
        profileView.frame = CGRectMake(0, 50, 320, 395);
        profileView.backgroundColor = [UIColor clearColor];
        [[[CCDirector sharedDirector] openGLView] addSubview:profileView];
   
Then you can create the switch and add to the UIView:

        UISwitch *mySwitch = [[UISwitch alloc] initWithFrame:CGRectMake(130, 235, 0, 0)];
        [mySwitch addTarget:self action:@selector(changeSwitch:)
                               forControlEvents:UIControlEventValueChanged];
        [profileView addSubview:mySwitch];

When the state of the switch is changed, it will trigger the following function:       

        -(void)changeSwitch:(UISwitch *)mySwitch{
                   // By NSLog, you can get the current state of the switch
                   NSLog(@"%@", mySwitch.on ? @"On" : @"Off");
        }

Sunday, 16 June 2013

How to make a simple segmented control button programmatically in your cocos2d application

You may have noticed the segmented control button in iPhone and iPad applications. In this tutorial, we will teach you how to make a simple segmented control button programmatically in your cocos2d application.


For creating  the segmented control view, first create an UIView:
 
        UIView *profileView = [[UIView alloc] init];
        profileView.frame = CGRectMake(0, 50, 320, 395);
        profileView.backgroundColor = [UIColor clearColor];
        [[[CCDirector sharedDirector] openGLView] addSubview:profileView];
      
Then create the segmented control label array:
 
        NSArray *itemArray = [NSArray arrayWithObjects: @"First", @"Second", nil];
  
After that, create the UISegmentedControl and add to the UIView:

        UISegmentedControl *segmentedControl = [[UISegmentedControl alloc] initWithItems:itemArray];
        segmentedControl.frame = CGRectMake(0, 0, 150, 40);
        segmentedControl.center = CGPointMake(160, 240);
        segmentedControl.segmentedControlStyle = UISegmentedControlStylePlain;
        segmentedControl.selectedSegmentIndex = 1;
        segmentedControl.tintColor = [UIColor colorWithRed:0.1f green:0.4f  blue:0.65f  alpha:1.0f];
        segmentedControl.segmentedControlStyle = UISegmentedControlStyleBar;
      
        [segmentedControl addTarget:self
                             action:@selector(segmentChanged:)
                   forControlEvents:UIControlEventValueChanged];
        [profileView addSubview:segmentedControl];

Monday, 10 June 2013

How to draw simple lines in cocos2d

Here, I will show you 2 simple methods to draw lines in cocos2d applications.


Method 1 - Draw line - default method, updates in each frame:

Syntax:
 
    - (void)draw{
           [super draw];
           glColor4ub(0,0,0,255);
           glLineWidth(2);
           glColor4f(1.0, 1.0, 0.5, 1);
           ccDrawLine(ccp(0,100), ccp(320,150));    // Draw line connecting (0,100) & (320,150)
    }
       

Method 2 - Draw line using CCRibbon:
        This  is a very simple method to draw lines in cocos2d. The advantage of this method is that, you can even draw lines with your textured image.


Syntax:
 
        ccColor4B myColor = ccc4(255, 255, 255, 150);
        CCRibbon *ribbon = [CCRibbon ribbonWithWidth:0.5
                                                                              image:@"green.png"
                                                                              length:1.0
                                                                              color:myColor
                                                                              fade:0.7f];

        [self addChild:ribbon z:8];
       
        [ribbon addPointAt:ccp(0,240) width:2];          // This will initialize the starting point at (0,240)
        [ribbon addPointAt:ccp(320,200) width:2];      // This will connect the previous point[(0,240)]
                                                                                   with (320,200) via a straight line


Sunday, 9 June 2013

How to create checkbox in HTML

 Checkboxes are useful for selecting multiple values, such as: the vehicles you own, foods you like, places you like/want to visit, etc.

Syntax:

               <input type="checkbox" name="food" value="Chinese">Chinese<br>
               <input type="checkbox" name="food" value="Western">Western<br>
               <input type="checkbox" name="food" value="Indian">Indian<br>
               <input type="checkbox" name="food" value="African">African

Output:


             Chinese
             Western
             Indian
             African

How to create radio buttons: HTML

 Radio buttons are useful for selecting any one choice from options. Usually these are used inside html forms( <form> ... </from> ). You may have noticed such items during online exams and questionnaire, gender selection, favorite selection, etc. Here I'll show you an example radio button used for selecting my favorite car:

Syntax:

         <input type="radio" name="favorite" value="bmw">BMW<br/>
         <input type="radio" name="favorite" value="benz">Benz<br/>
         <input type="radio" name="favorite" value="audi">Audi<br/>
         <input type="radio" name="favorite" value="ferrari">Ferrari


Output

           BMW
           Benz
           Audi
           Ferrari

How to call sprite sheet animation: cocos2d

To add sprites from spritesheet and animating the frames, you can use the following code:

in .h:

        CCSprite *sprite_1;
        NSMutableArray *spriteAnimArray;

in .m:

    //In init method, add sprite frames from plist file
 
        [[CCSpriteFrameCache sharedSpriteFrameCache] addSpriteFramesWithFile:@"plistName.plist"]; 
         sprite_1 =[CCSprite spriteWithSpriteFrameName:@"sprite1.png"];
        sprite_1.position = ccp(240,240);
        [self addChild:sprite_1 z:2];

        [self spriteAnimation];        // call sprite animation function


  //SpriteAnimation function

    -(void)spriteAnimation{
        spriteAnimArray = [NSMutableArray new];

        // call sprite1 to sprite4 from spritesheet //
        for(int i=1; i<=4; s++)      
        {
            [spriteAnimArray addObject:[[CCSpriteFrameCache sharedSpriteFrameCache]
                                                spriteFrameByName:[NSString stringWithFormat:@"sprite%d.png",i]]];
        }
       
        CCAnimation *animate = [CCAnimation animationWithFrames:spriteAnimArray delay:0.3f];
        CCRepeat *sprite_Action = [CCRepeatForever actionWithAction:
                                                    [CCAnimate actionWithAnimation:animate
                                                    restoreOriginalFrame:YES]];       

        [sprite_1 runAction:sprite_Action];
        [spriteAnimArray release];
    }

Array and Array Operations: PHP


Array creation:

To initialize an array in PHP:

$names_1  = array();   
                       
To add value to that array:

$names_1[] = "Bob";   
$names_1[] = "Marley";
$names_1[] = "Alex";
$names_1[] = "David";

You can also construct an array as follows:

            $arr1 = array(10,30,10,20,50);
           
To print the created array:

            print_r($names);


Array operations:
                       
To convert a string to array:

            You can use ‘explode’ to split an string with characters and add each element to array as below:

$names_2 = "Bob,Marley,Alex,David";
                       
$names_3 = explode("," , $names_2);   //--> String to array
print_r($names_3);                                                      
                       
To convert a array to string:

            If you want to get the elements from the array, and convert it into a string with each array elements separated by a character [say coma ‘,’], then you can make use of PHP ‘implode’.

print(implode(",",$names_1));               //--> Array to string
 
To eliminate similar data/elements from an array (array_unique):

$arr1 = array(10,30,10,20,50);

                       
$arr1 = array_unique($arr1);    //--> To eliminate similar data from the array
 print_r($arr1);
                       
To sort and reverse sort an array (sort and rsort):

            sort($arr1);                               //--> To sort an array
print_r($arr1);
                       
            rsort($arr1);                             //--> To reverse-sort an array
            print_r($arr1);

To add/ concatenate two arrays (array_merge):
                       
            $arr_1 = array(10,30,10,20,50);
            $arr_2 = array("Leon","CEO",41);
                       
            $arr_3 = array_merge($arr_1,$arr_2);  //--> To concatenate 2 arrays
            print_r($arr_3);

           
To get index key of an array as an array:

$arr_4 = array("name"=>" Leon ","destination"=>"CEO","age"=>41);
            print_r($arr_4);                        //--> Array with key index
            print_r(array_keys($arr_4));     //--> To get the index keys as an array


To check whether an element is in an array:

            $arr_5 = array("apple","orange","mango","grape","peach");
                       
            if(in_array("orange",$arr_5)){
     //--> To check whether an element is in an array
                        echo "Element Found...";
            }